
How to Insert Images in Excel (Concise How-To Manual)
In this article, you will learn how to add pictures to cells in Excel.
Advantages of adding images in Excel
Inserting images into cells in Excel offers several benefits, including:
Improved Visualization: Adding images to cells can help you visualize data and make it easier to understand. For example, you could add a logo to represent a client in a list of data, making it easier to identify the client with its logo.
Enhanced Communication: Including images in your Excel worksheets can help you communicate information more effectively, especially when presenting data to others. For example: you can add your company’s logo when pitching projects to clients and thus, enhance your branding efforts.
Better Organization: Adding images to cells can help you organize your data and make it easier to understand. For example, you could add images to represent products in product catalogs. Furthermore, by inserting images to cells in Excel, you can save time and increase your productivity. For instance, instead of typing out a description of a product, you could add an image of the product to make it easier to understand.
Increased Engagement: Adding images to your Excel spreadsheets can make them more visually appealing and engaging, helping to hold the reader's attention and keep them focused on the information.
In conclusion, adding images to cells in Excel can greatly enhance the visualization and communication of your data. It can also help you organize your data and increase engagement.
How to insert images in Excel?
By following the below six steps, you can easily insert pictures into your Excel worksheets and customize their size and position.
Step 1: Open your Excel worksheet
Step 2: Click on the cell where you want to insert the image
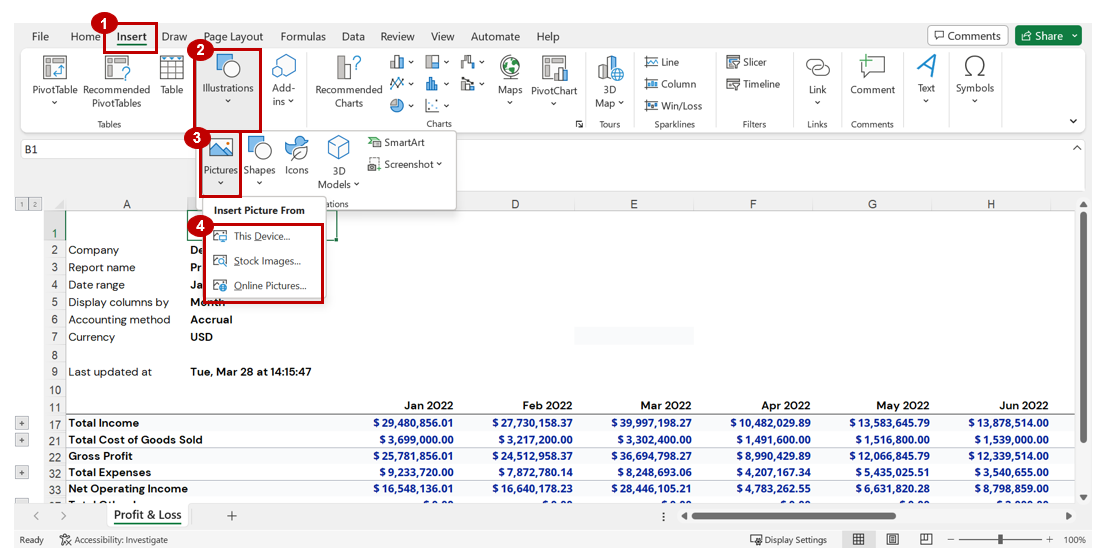
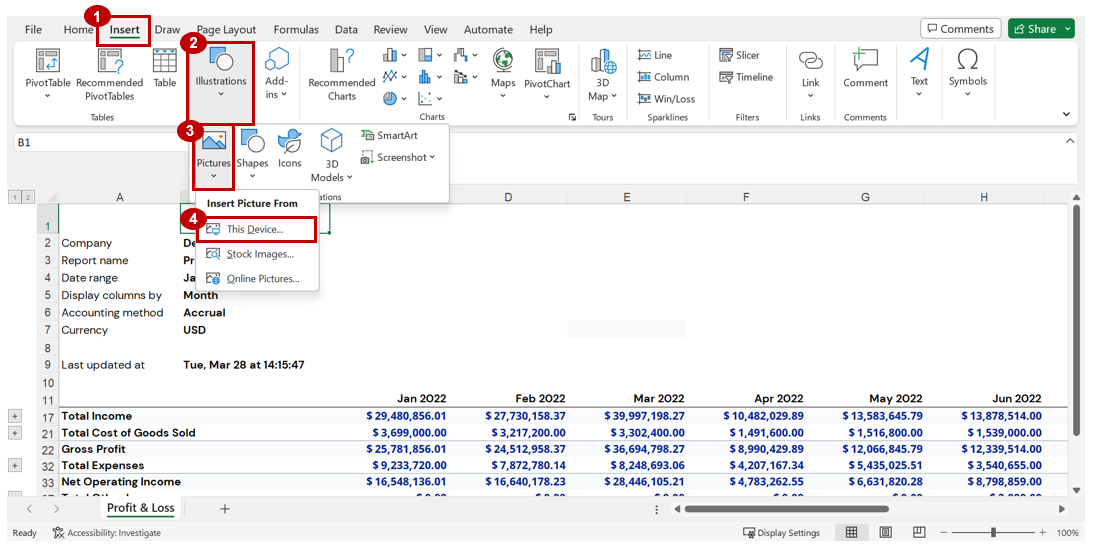
Step 3: Go to the ‘Insert’ tab in the Excel Toolbar
Step 4: Choose the ‘Illustrations’ option and then click on ‘Pictures’
This opens a drop-down menu, where you can select an image from either of the below three options:
- ‘This Device’: Images saved in your local device
- ‘Stock Images’: Pre-loaded excel pictures
- ‘Online Pictures’: Images from the web
Step 5: Once you click on either of the above options, search and select the picture you wish to insert. When you select the ‘This Device’ option, a file explorer window will open. Navigate to the location where the image is saved, select the image, and click on the ‘Insert’ button.
Step 6: You can resize the image by clicking and dragging the handles on the sides and corners of the image. Alternatively, you can resize the rows and columns to fit your image.
Learn how to easily resize rows and columns here:
How to Adjust Row Height in Excel (Easy Guide with Pictures)
How to Change Width of Column in Excel
You can also position the image by clicking and dragging it to a different cell location in the Excel sheet.
Case study: adding your company logo to an Excel sheet
Consider an example of inserting your brand logo into Excel spreadsheets. Follow the step-by-step process illustrated in the image below.
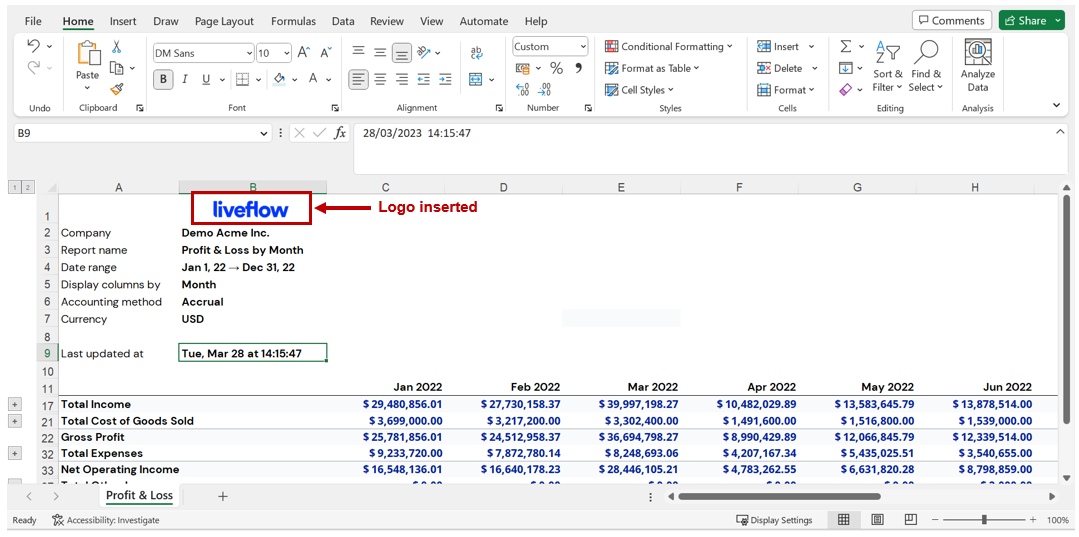
Once you select the logo image from your local device, the logo will be inserted into the cell as shown in the image below. Refer to step 6 above to adjust the image, row or column size.
Analyze your live financial data in a snap in Google Sheets
Are you learning this formula to visualize financial data, build a financial model, or conduct financial analysis? In that case, LiveFlow may help you automate manual workflows, update numbers in real-time, and save time. You can access various financial templates on our website, from the simple Income Statement to Multi-Currency Consolidated Financial Statement. Are you interested in this product but are an Excel user? That’s not a problem at all. You can connect Google Sheets to Excel quickly.
To learn more about LiveFlow, book a demo.

You can learn about other Excel and Google Sheets formulas and tips that are not mentioned here on this page: LiveFlow‘s How to Guides