
How to Track Changes in Excel: Explained
In this article, you will learn how to Track Changes in Excel
What does the Track Changes feature in Excel do?
The "Track Changes" feature in Excel is primarily designed for collaboration purposes, particularly when multiple users are working on the same workbook. It allows you to track and review the changes made to the workbook by different users. When the "Track Changes" feature is enabled, Excel keeps a record of the changes made to the workbook, including modifications to cell values, formatting changes, and other edits. These changes are logged, and you can review them later to see the details of each modification.
How to use the Track Changes feature in Excel?
To track changes in Excel, you can use the "Track Changes" feature. This feature allows you to see who made changes, what changes were made, and when they occurred. Here's how to enable and use the "Track Changes" feature:
Step 1: Open your Excel workbook and go to the "Review" tab in the Excel ribbon.
Step 2: Click on the "Track Changes" button. If the button is greyed out, it means that Track Changes is already enabled.

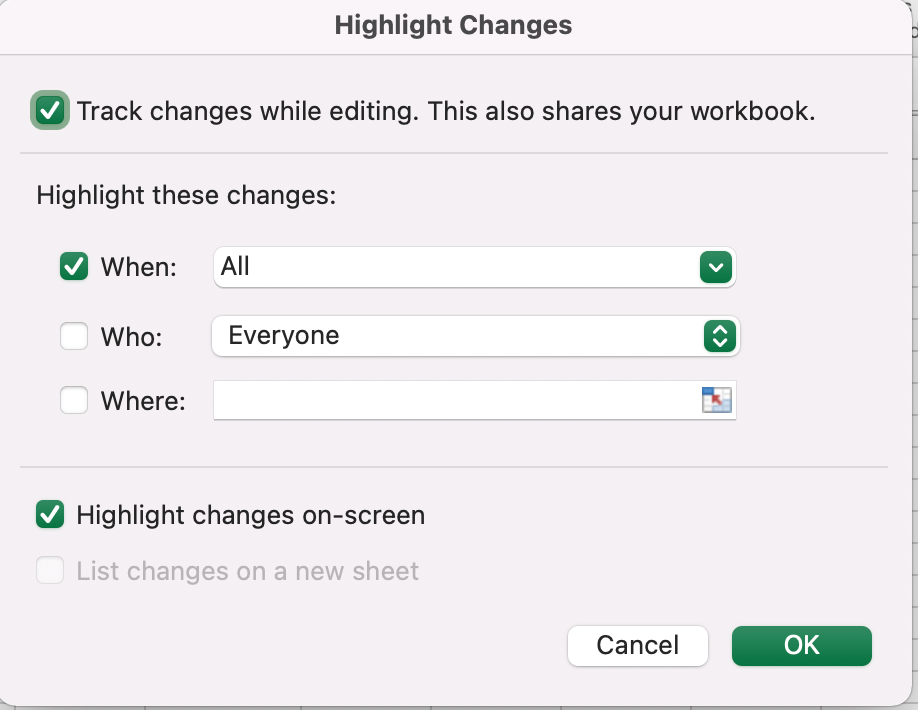
Step 3: In the "Track Changes" drop-down menu, select "Highlight Changes"
Step 4: The "Highlight Changes" dialog box will appear. Check the box next to "Track changes while editing. This also shares your workbook" You can optionally select other options, such as tracking changes on a specific sheet or tracking changes on a shared network file.
Step 6: Click "OK" to close the "Highlight Changes" dialog box.
Make the desired changes in your Excel worksheet. Excel will automatically track and highlight the changes based on your selected settings.
Step 1: To view the changes, go back to the "Review" tab and click on the "Track Changes" button. From the drop-down menu, select "Highlight Changes" again.
Step 2: The "Highlight Changes" dialog box will appear. Here, you can choose to view the changes made by specific users, within a specific date range, or other criteria. Adjust the options as needed and click "OK."
Step 3: Excel will highlight the changes according to your selected options, making it easy to see what has been modified. You can also navigate through the changes using the arrows provided in the "Track Changes" group of the "Review" tab.
Note: The "Track Changes" feature in Excel primarily focuses on changes made to the structure of the workbook (e.g., inserting or deleting sheets, changing cell formatting) rather than specific cell values. You may need to use other methods to track detailed cell-level edits, such as comments or a separate log sheet.
How to enable Track Changes in Excel on MAC?
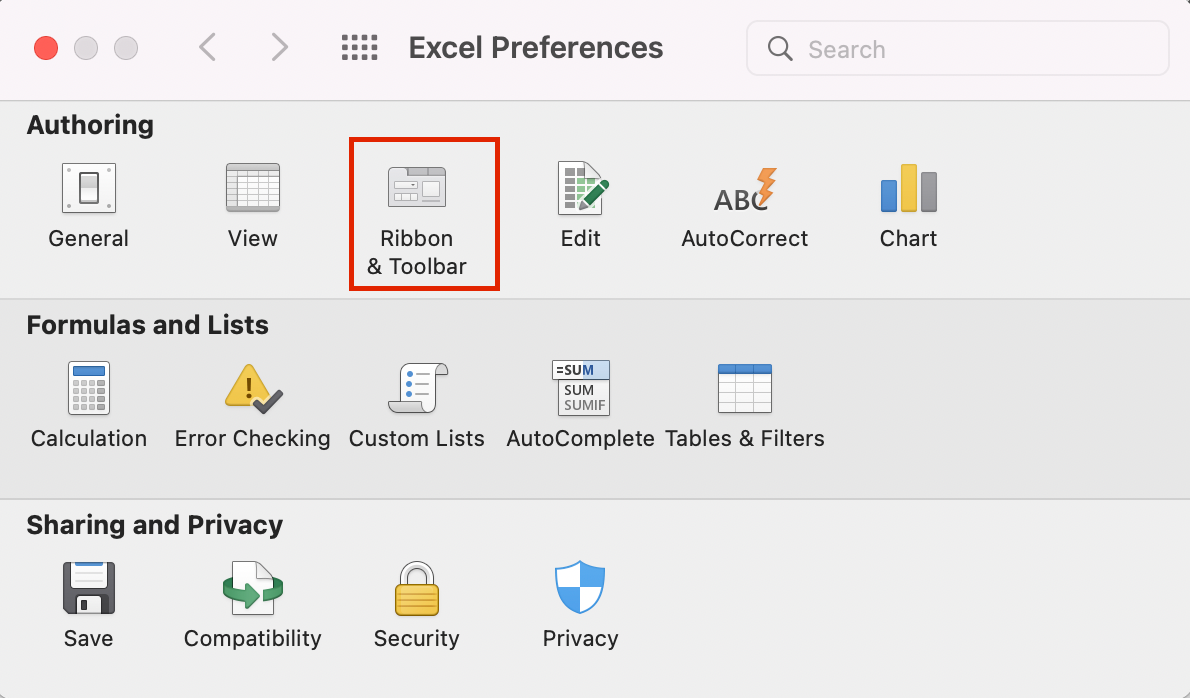
In Excel for Mac, the "Track Changes" option may not be available directly in the Review tab. In that case you can use the following options to add it into the Review tab.
Step 1: Go to Excel >> Preferences and Select the Ribbon & Toolbar option on the dialog box that appears
Step 2: In the Ribbon section change the “Choose commands from:” option to “All Commands”.
Step 3: In the “Customise the Ribbon” section in the Review Tab use the + sign to add a “New Group”. You can assign any name to the “New Group”, like “Track Changes (Custom)” shown below.
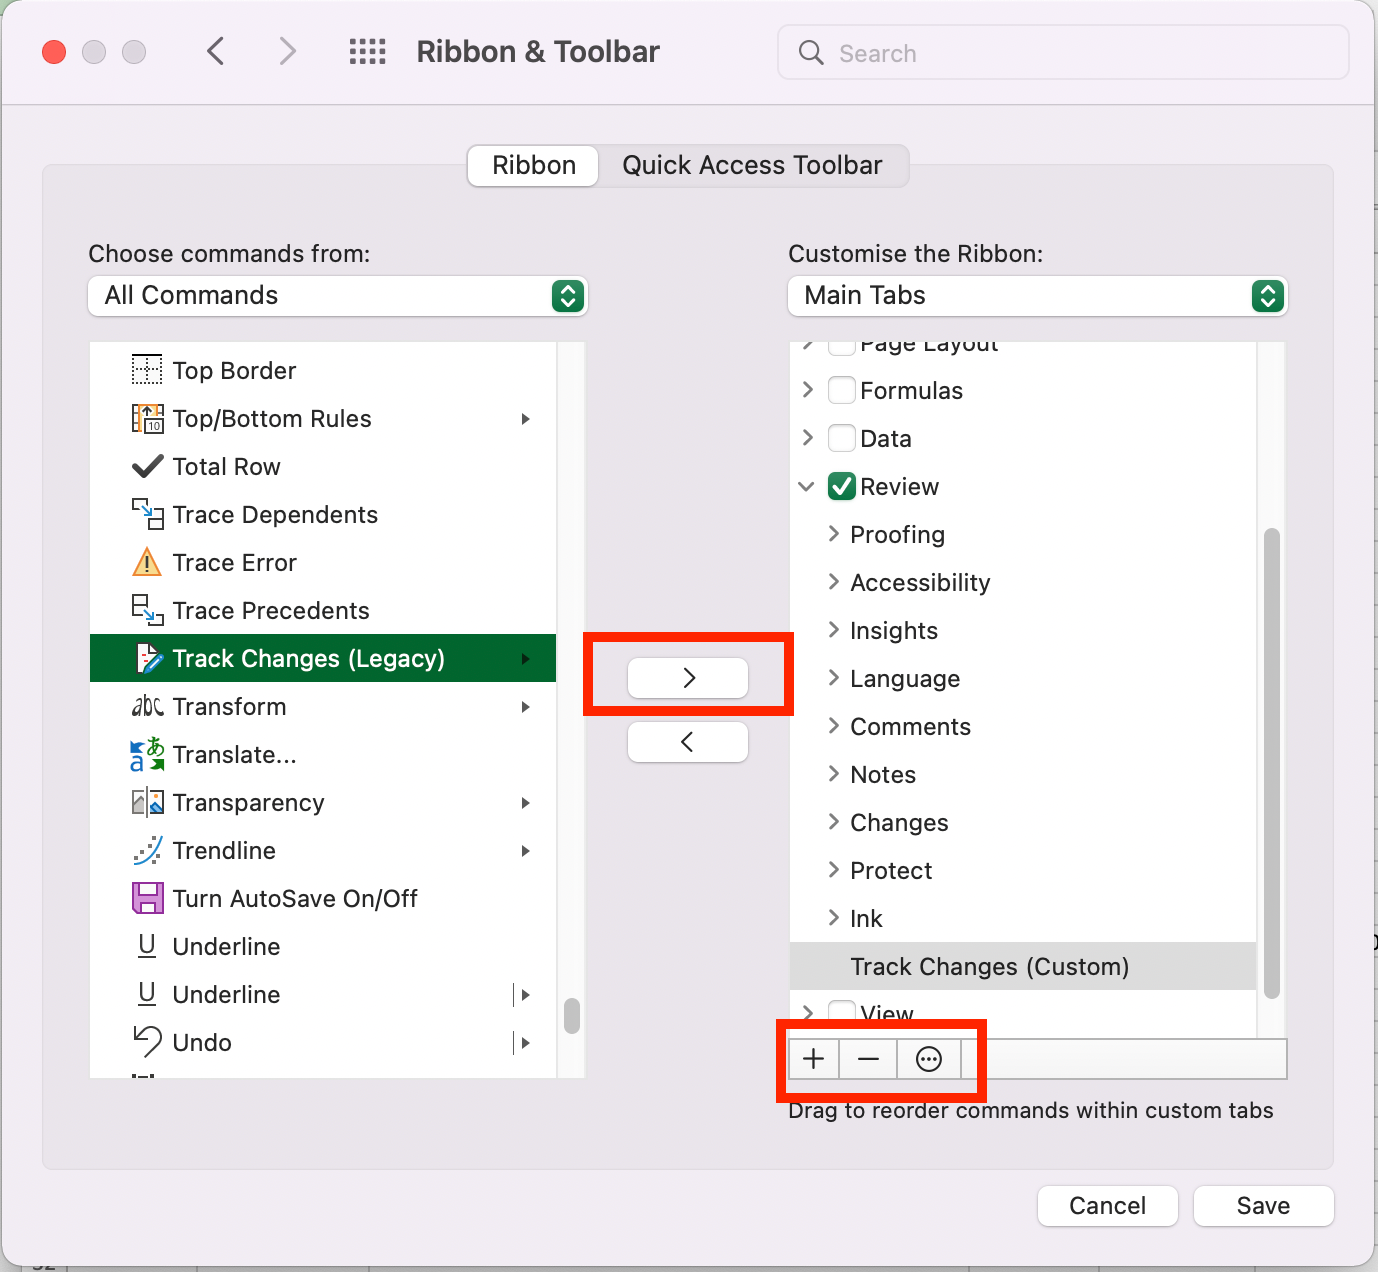
Step 4: Select the “Track Changes (Legacy)” option from the “All Commands” and use the “>” arrow button to move it to the “Track Changes (Custom)” group created above.
Step 5: Save the changes. The “Track Changes” option will now be available in the “Review tab” on Excel.