
Setting up Print Area in Excel: 2 Quick Methods
In this article you will learn how to set up a print area to print your excel sheets meaningfully.
Why should you define a print area when printing Excel spreadsheets?
Defining a print area in Excel is useful because it allows you to print a specific part of your worksheet rather than the entire worksheet. This can be helpful in several ways, including:
- Saving paper and ink: When you print only the necessary cells, you save paper and ink and reduce printing costs.
- Printing specific data: By defining a print area, you can print only the data that is relevant to your needs, making it easier to read and analyze.
- Controlling page breaks: By setting a print area, you can control where page breaks occur on your printed pages. This can help to prevent awkward page breaks that split data across pages.
- Improving clarity: Printing a specific part of a worksheet can make it easier to read and understand, especially if you have a large worksheet with many columns and rows.
Overall, defining a print area can help you save time, money, and improve the quality of your printed worksheets.
How to set up the print area in Excel?
To set up a print area in Excel, follow these steps:
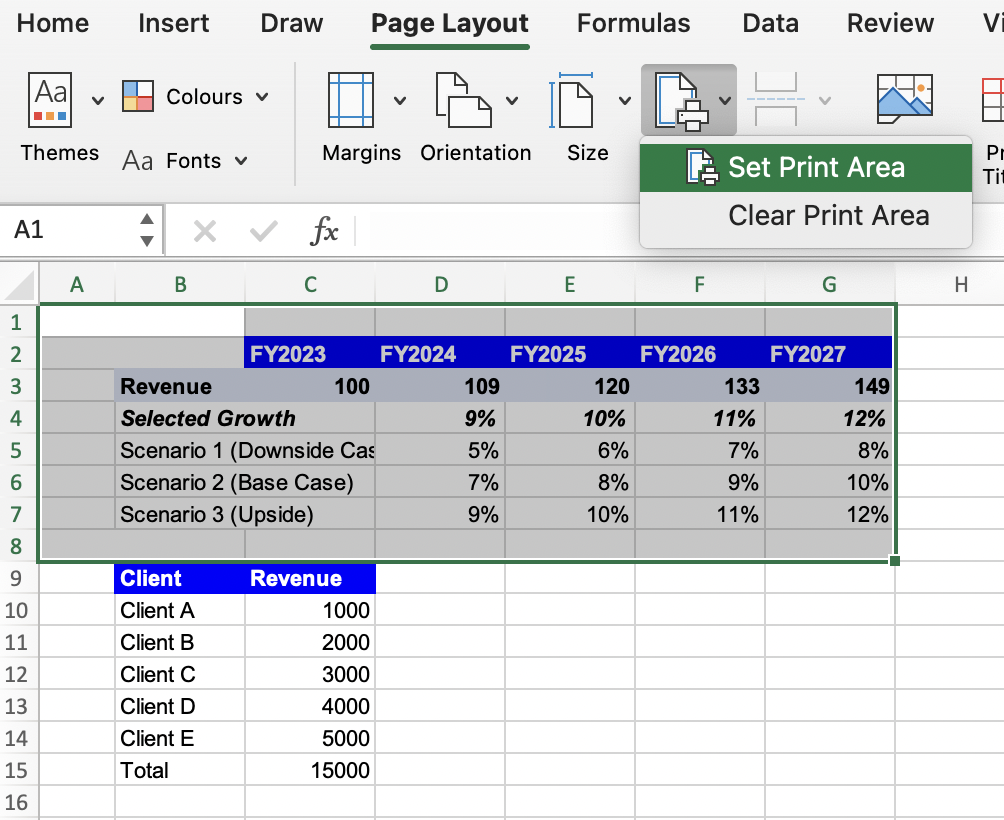
Method 1
Step 1: Select the cells that you want to print.
Step 2: Click on the "Page Layout" tab in the ribbon.
Step 3: Click on the "Print Area" button in the "Page Setup" group.
Step 4: Select "Set Print Area" from the drop-down menu.
Instead, you can use the following shortcuts to set a print area for the selected range on Windows: “Alt”+”P”+”R”+”S”
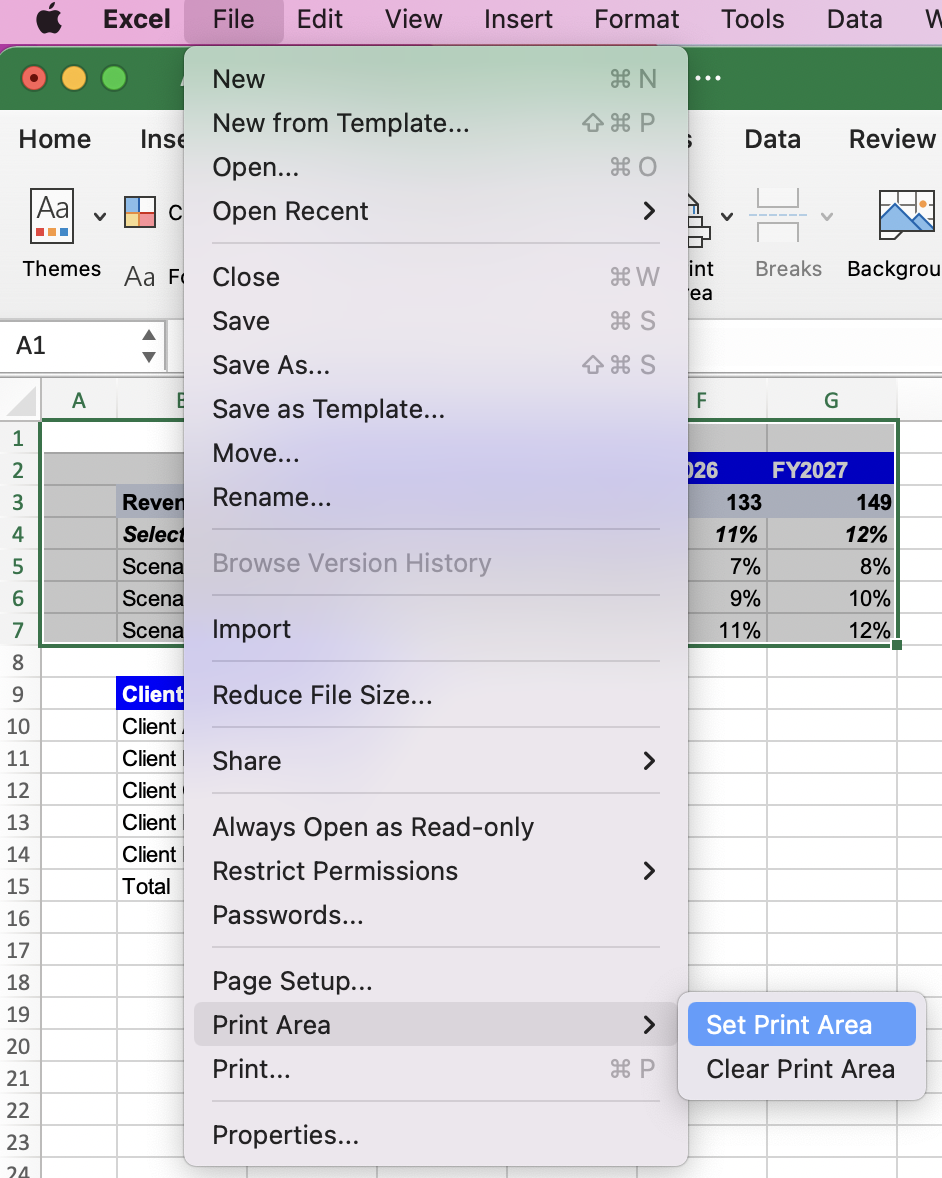
Method 2 (for Mac users):
Change the last step in the above list to below.
Step 4: You can also set a print area by selecting the cells you want to print and then clicking on the “File” menu. In the “File menu”, select "Print Area" and then "Set Print Area."
Note 1: To clear the print area, simply click on the "Print Area" button and select "Clear Print Area" from the drop-down menu. The shortcuts on Windows are “Alt”+”P”+”R”+”C”
Note 2: Once you have set the print area, you can preview what the printed page will look like by clicking on the "Print Preview" button in the "Page Setup" group on the "Page Layout" tab.
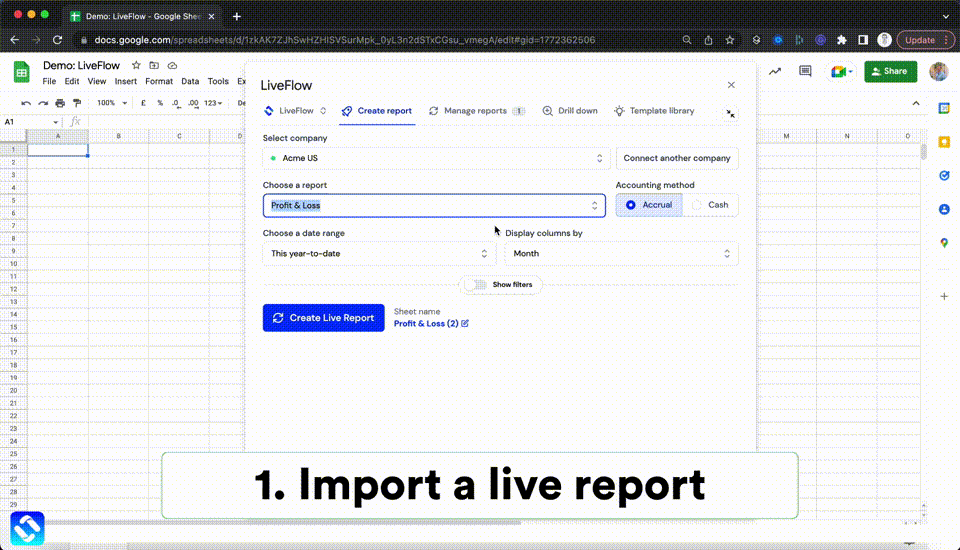
Analyze your live financial data in a snap in Google Sheets
Are you learning this formula to visualize financial data, build a financial model, or conduct financial analysis? In that case, LiveFlow may help you automate manual workflows, update numbers in real-time, and save time. You can access various financial templates on our website, from the simple Income Statement to Multi-Currency Consolidated Financial Statement. Are you interested in this product but are an Excel user? That’s not a problem at all. You can connect Google Sheets to Excel quickly.
To learn more about LiveFlow, book a demo.
You can learn about other Excel and Google Sheets formulas and tips that are not mentioned here on this page: LiveFlow‘s How to Guides