
DROP Function in Excel: Explained
In this article, you will learn about the DROP formula and its uses in Excel.
What is the DROP function in Excel?
The DROP function in Microsoft Excel allows you to obtain a subset of an array by excluding specific rows and columns. You can determine the number of rows and columns to be removed using separate arguments for rows and columns. It is possible to remove rows and columns from either the beginning or the end of the array.
Syntax of the DROP function in Excel
The syntax of the Excel DROP function is as follows:
array: (required) This is the source array from which we need to drop rows or columns.
rows: (optional) This is the number of rows to be dropped. When a positive value is used, rows are removed from the beginning of the array, whereas a negative value removes rows from the end of the array.
columns: (optional) The number of columns to be dropped can be specified. A positive integer will remove columns from the beginning of the array, while a negative integer will remove columns from the end of the array.
Note: The DROP function is only available in Excel for Microsoft 365 (for Windows and Mac) and Excel for the web. Also, note that if no value is provided for rows or columns, the DROP function will return all rows/columns in the result. Lastly, If the absolute value of the rows or columns argument is equal to or greater than the total number of rows or columns in the array, the DROP function will return a #CALC! error.
How to use the DROP formula in Excel?
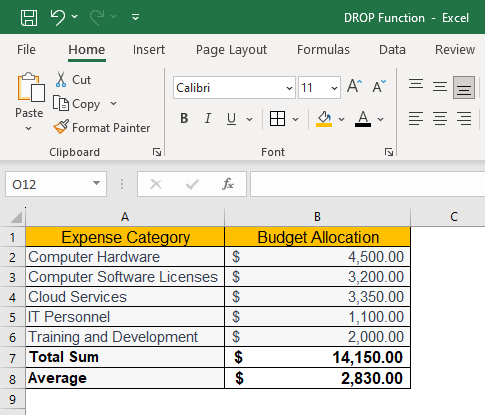
Understand the DROP function by checking practical examples. The dataset below includes categories and their allocated budget, along with the total budget and average budget across all categories. The objective is to fetch the specific records from the database, dropping the total sum and average rows from the dataset.
The syntax of the DROP formula is as follows:
array: In this case, you choose the entire dataset, so the argument should be A1:B8
rows: Since we need to drop the total sum and average rows from the dataset, we would set the value as -2 (representing two rows from the bottom of the dataset)
Columns: We omit this optional parameter this time.
Hence our complete function would look below:
We insert this specific formula in cell E2 and press enter to see the outcome provided by the function.
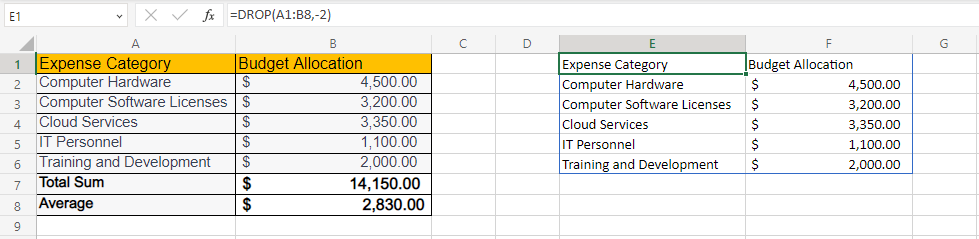
As you can see, the results returned by the DROP function do not contain the total and average rows.
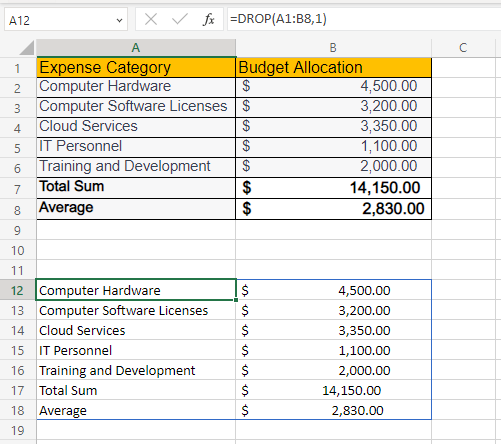
Look at another sample case in which we must display the dataset, excluding the headers. We can enter the following formula in a cell.
The above function would drop the first row from the original table, and show the second and following rows downwards.
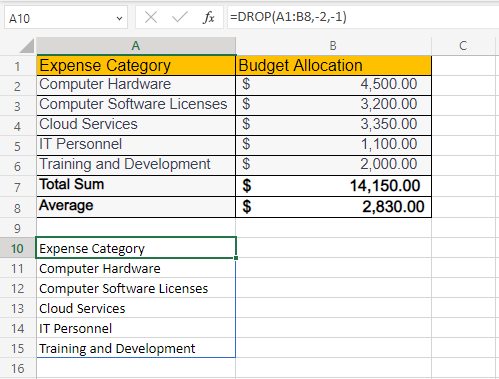
Consider another example in which we need to display the expense categories only and eliminate the allocated budget and the total sum and average amounts. The formula required would be as follows:
The above function contains the source array from cell A1:B8. “-2” in the row argument indicates that the last two rows are dropped. “-1” in the column argument implies that the last column is dropped.
When should you use the DROP formula in Excel?
The DROP function in Excel offers several applications for data manipulation. Here are some instances where you can utilize the DROP function:
- Eliminating headers and footers in an Excel report to obtain only the data.
- Removing redundant rows or columns from a table.
- Eliminating empty rows or columns from a table.
- Removing duplicate entries from a table.
- Extracting specific data elements from a table.


