How to Insert an Image into a Cell in Google Sheets
In this article, you will learn how to add a picture in a cell by using the IMAGE function in Google Sheets.
How to add an image into a cell with the IMAGE formula in Google Sheets
To add an image to a cell in Google Sheets, you can use the IMAGE formula. The syntax for the IMAGE formula is as follows:
url is the URL of the image you want to insert. This can be a direct link to the image file, or a link to a page that contains the image. Note you should enclose the url with quotation marks to make it valid input.
mode (optional) specifies how the image should be displayed in the cell. The possible
values are 1(the default), 2, 3, and 4.
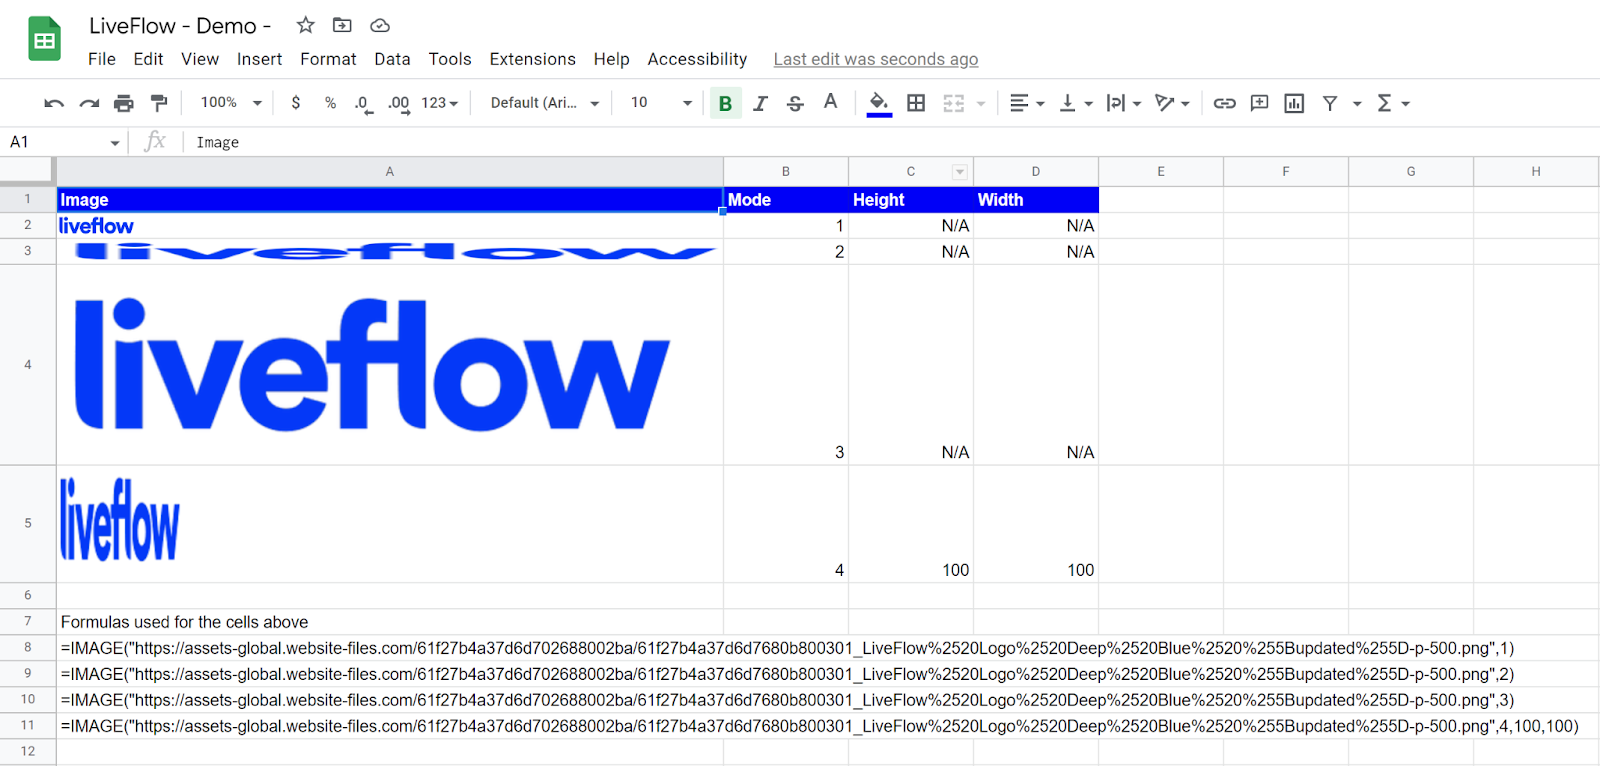
1 resizes the image to fit inside the cell, maintaining the original aspect ratio.
2 stretches or compresses the image to fit inside the cell, ignoring the initial aspect ratio.
3 leaves the image at its original size, which may cause cropping.
4 allows the specification of a custom size.
Note that no mode causes the cell to be resized to fit the image.
height (optional) specifies the height of the image in pixels. To make this argument valid, the mode parameter should be set as 4.
width (optional) specifies the width of the image in pixels. Same as height parameter, to make this argument valid, the mode parameter should be set as 4.
Here is an example of how you could use the IMAGE formula to add an image to a cell:
This formula would insert the image at the specified URL into the cell. The height and width of the image would be automatically calculated based on the image's original aspect ratio.
You can also use the mode, height, and width arguments to customize how the image is displayed in the cell. For example, the following formula would insert the image and stretch it to fit the entire cell:
The following picture shows what formulas with different mode parameters look like with our logo.

How can I insert an image in a cell manually in Google Sheets
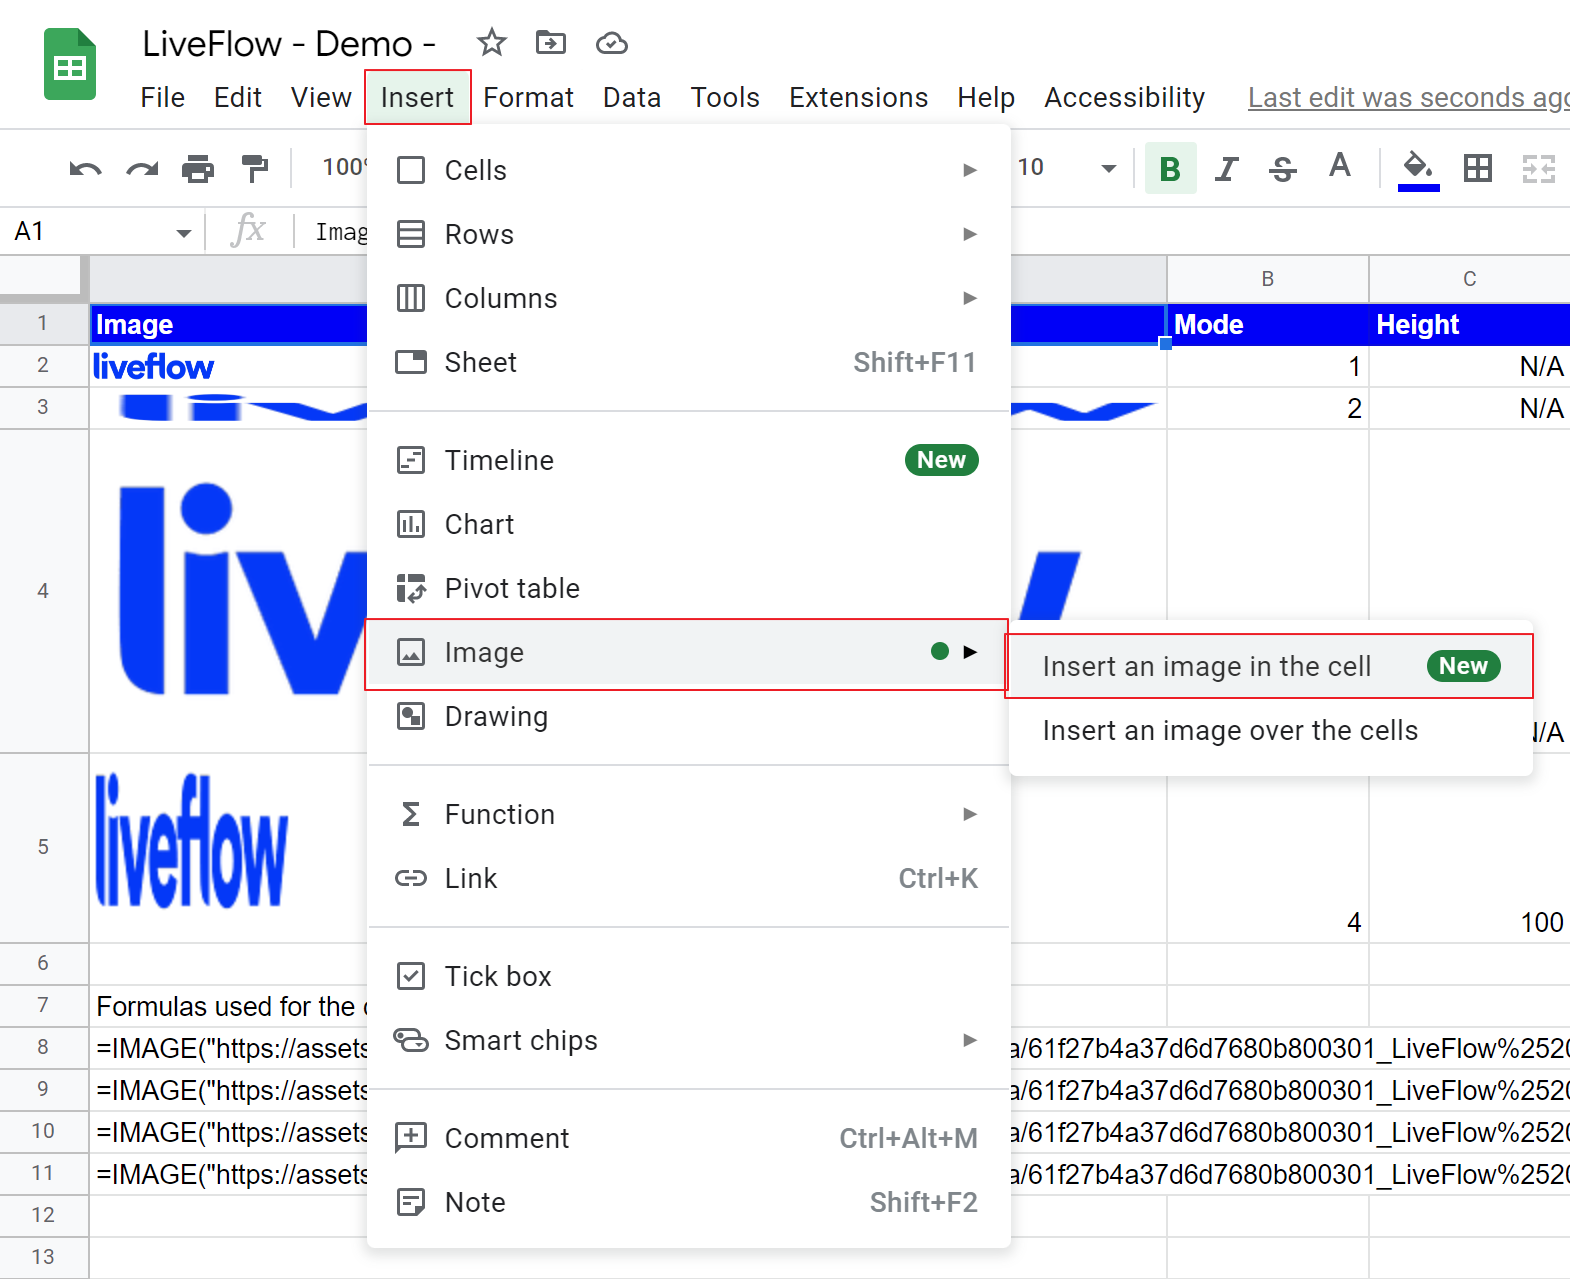
You can add a picture in a cell without any formula by following the steps below:
- Open the Google Sheets file in which you want to insert an image.
- Click on the cell in which you want to insert the image.
- Click on the "Insert" menu at the top of the screen and select "Image" from the dropdown menu.
- In the "Insert Image" dialog box that appears, select the image you want to insert from your computer or from a URL.
- Click "Select" to insert the image in the selected cell.

What is the shortcut to insert a picture into a cell in Google Sheets?
Unfortunately, there is no built-in shortcut to insert a picture into a cell in Google Sheets. However, as described in the section above, you can use the IMAGE formula to add an image to a cell.


