
Named Range in Google Sheets: Explained
In this article, you will learn the Named Range and how to use it in Google Sheets.
What is the purpose of a named range?
The Named Range is one of the functions in Google Sheets, which allows you to give a name to a range or an array, and use the name (as a substitute for cell reference) in a formula. For instance, assume you have a formula such as “=SUM(B2:B6)”. If you name the range of B2:B6 as “sample” and register it, the SUM formula with the named range, “=SUM(sample)”, works properly. Thus, this function is beneficial when you repeatedly refer to a specific range or array in your formulas for your work.
How to name a range
- Select a cell, a range, or an array you want to name.
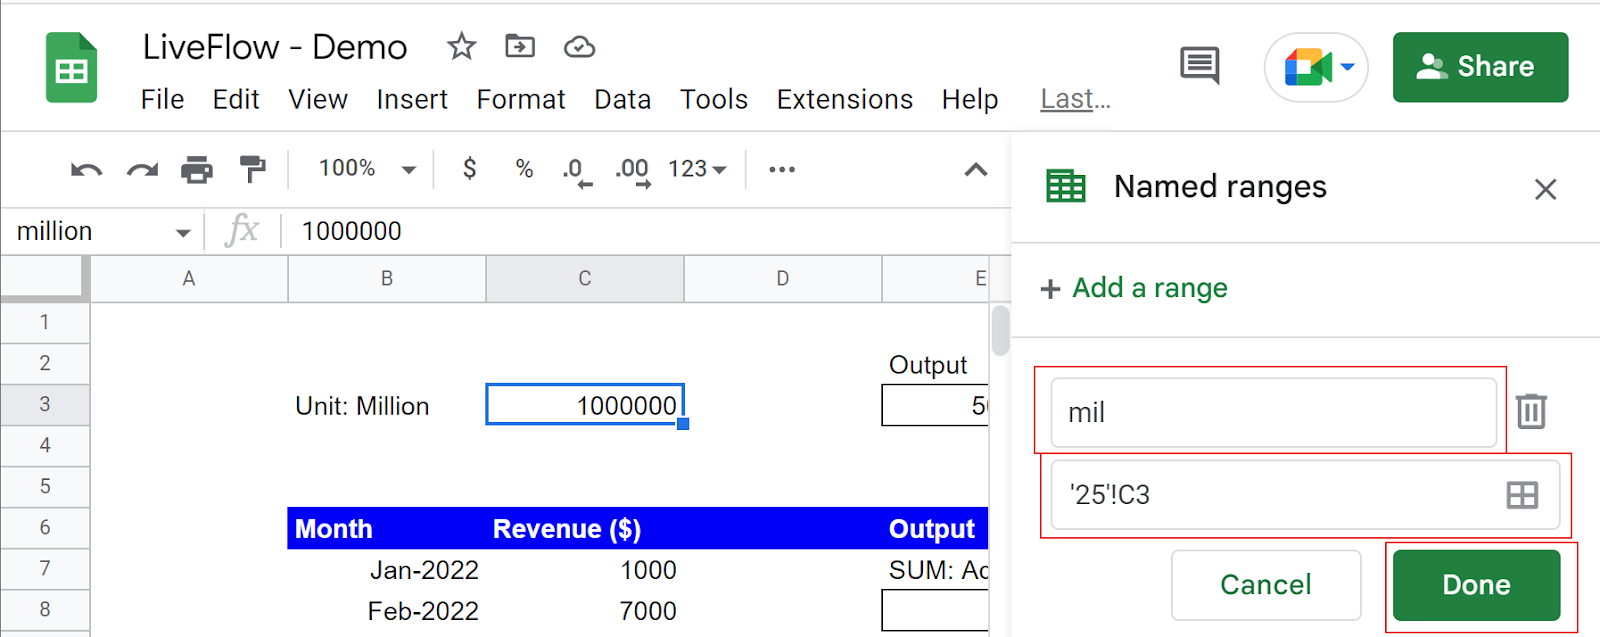
- Navigate to the “Data” tab → “Named range”, which opens a menu on the right side.
- Input a name for the selected range in the upper text box in the menu.
- Ensure the proper range is selected. Revise it if it is not correct.
- Click the “Done” button at the bottom right corner.
Steps 1 and 2

Steps 3 to 5
What you need to bear in mind when you name a range are as follows
- You can use only letters, numbers, and underscores for a name. Any spaces and punctuation are not allowed.
- A name can’t start with a number or the words 'true' or 'false'.
- The number of characters needs to be within one to two hundred fifty.
- You can’t give a cell or range a name similar to a cell or range address like “A1” or “A2:C5”.
How do the Named Ranges work in Google Sheets?
See how the Named Ranges work on a worksheet by looking at examples.
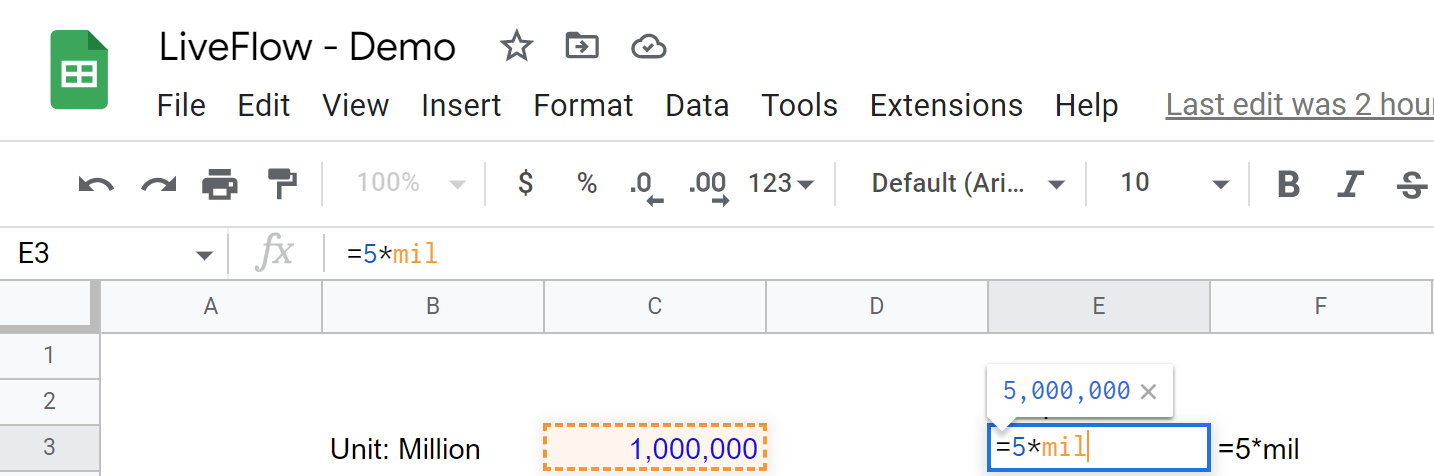
The first example shows how to use a Named Range representing a cell. We named cell C3 “mil”. This cell is to unit conversion. In cell E3, we want to show five million. So, we need to multiply 5 by 1,000,000, when you can use the named range. You can type “=5*mil”, and the “mil” part refers to the value contained in “mil” (cell C3). Thus, you get 5*1,000,000=5,000,000 in cell E3 as a result.
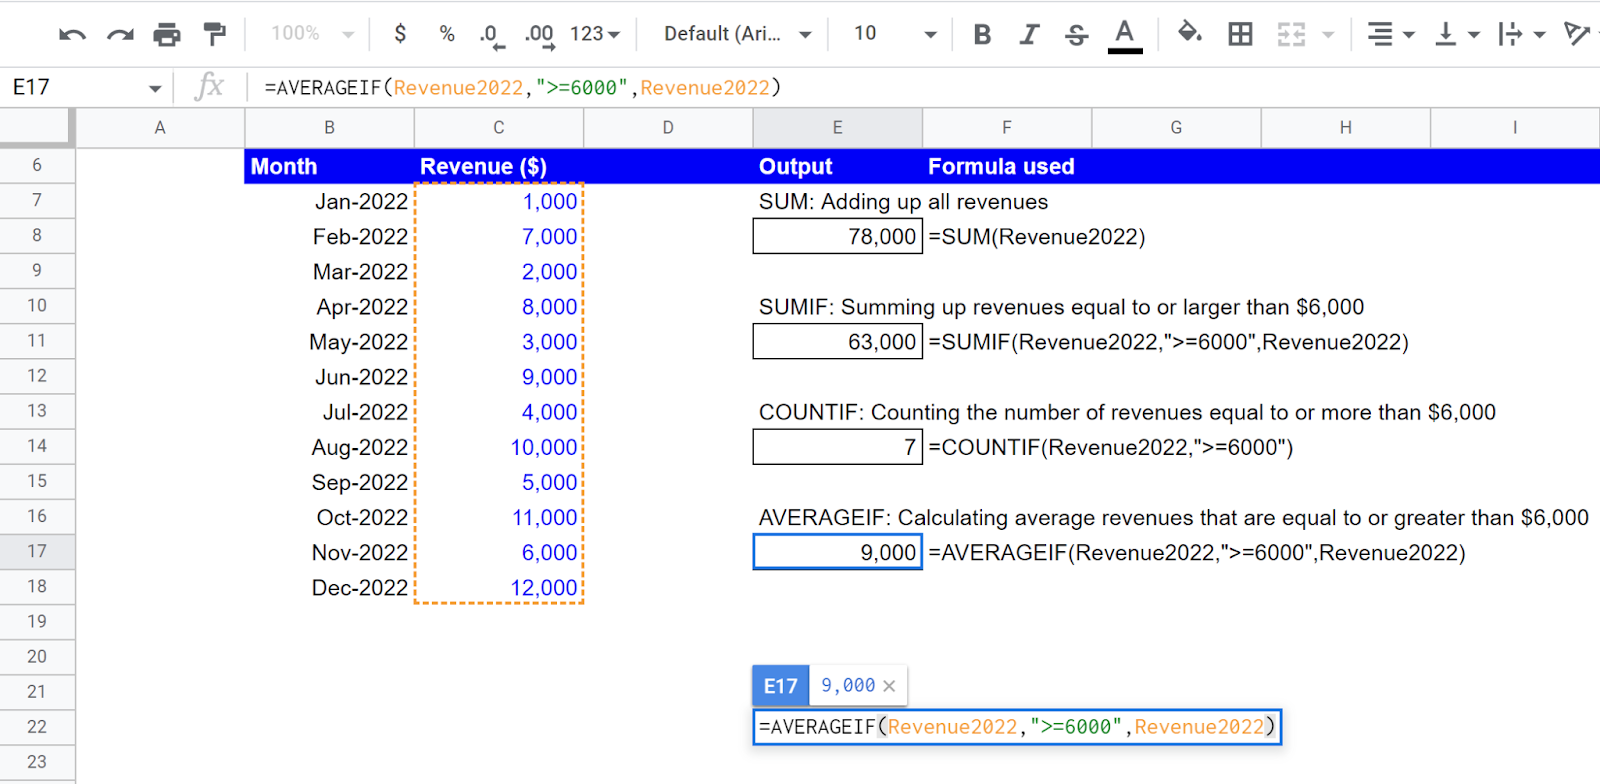
The other examples in the picture above show how to use a Named Range for a range.
As you can see, we named a range of cells (C7:C18) “Revenue2022”. You can input this name instead of a cell reference in each formula. These examples are relatively simple, so you may feel that you don’t need to set a named range. However, if you have a much larger data set and need to run an analysis with various formulas, the Named Range function benefits you for sure.
How to edit the existing Named Ranges
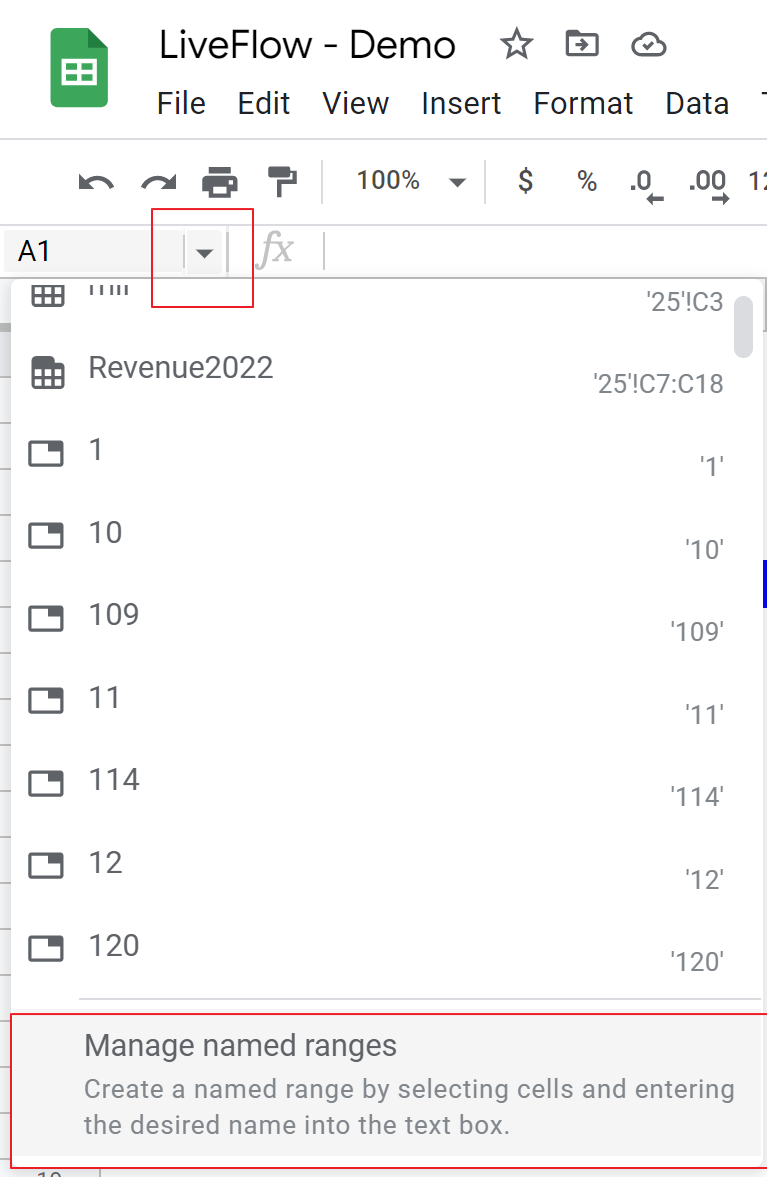
- (i - quicker) Go to the top corner and click the drop-down menu → “Manage named ranges” or (ii) Navigate to the “Data” tab → “Named range” or o to, both of which open a menu on the right side.
- Hoover your mouse cursor above the Named Range you want to edit, showing a pencil icon.
- Click the pencil icon and modify the formula.
Lastly, learn the pros and cons of the Named Ranges in the section below.
Pros and Cons of the Named Ranges
Pros
The Named Ranges:
- Make your worksheets easy to follow
- Make your work efficient as you can insert arguments in formulas more quickly
Cons
The Named Ranges:
- Get your collaborators confused when they are not named appropriately
- The more significant number of named ranges you have, the more difficult it is for you to come up with short but identical names


