
TEXTAFTER Function in Excel: Explained
In this article, you will learn about the TEXTAFTER Function and its uses in Excel.
What is the TEXTAFTER Function in Excel?
The TEXTAFTER function in Excel is designed to extract text that follows a specific character or substring, known as the delimiter. This function also allows you to choose a particular occurrence of the delimiter in cases with multiple instances. If the delimiter cannot be found, the formula can return an error message such as #N/A, your own specific text, or the original string.
When is the TEXTAFTER Function in Excel beneficial?
Here are some use cases for the TEXTAFTER function in Excel:
- Extracting domain names from email addresses: you can use the TEXTAFTER function to pull out the domain name from an email address.
- Extracting file extensions: If you have a list of file names in Excel and want to extract their file extensions, you can use the TEXTAFTER function to pull the text after the "." character.
- Extracting data from URLs: If you have a list of URLs in Excel and want to pull out a specific part of the URL (such as the subdomain or the path), you can use the TEXTAFTER function to extract the relevant text.
- Cleaning data: Sometimes, text data in Excel can contain unwanted characters or symbols. You can use the TEXTAFTER function to remove these characters and extract the clean text. For example, if you have a list of product codes that include a prefix before the actual code (such as "PR1234"), you can use the TEXTAFTER function to extract only the code and remove the "PR" prefix.
Syntax of TEXTAFTER Function in Excel
The syntax of the Excel TEXTAFTER function is as follows:
- “text” (Required) - The text from which you will extract a text string. Wildcard characters are not allowed.
- “delimiter ” (Required) - The text that is the point after which you want to quote.
- “instance_num” (Optional) - The instance of the delimiter after which you want to extract the text. By default, “instance_num” is 1. With -1 in this argument, the formula starts searching from the end and tries to find the first delimiter from the end of the text string.
- “match_mode” (Optional) - Determines whether the text search is case-sensitive. 0 or 1 can be input. 0 makes the function case-sensitive, and 1 makes it case-insensitive. The default is case-sensitive.
- “match_end” (Optional) - Treats the end of the text as a delimiter. You can enter 0 or 1. With 0 argument, the formula doesn’t match the delimiter against the end of the text. With 1 argument, the function does the opposite. By default, the text is an exact match.
- “if_not_found” (Optional) - Value returned when no match is identified. By default, #N/A is returned.
The function has 6 arguments, of which only the first two are required.
How to use the TEXTAFTER function in Excel
We walk through the TEXTAFTER function with the help of an example case. The below dataset is of company employees and their designation records as retrieved from the legacy system. Now the objective is to extract the employee designation from the dataset.
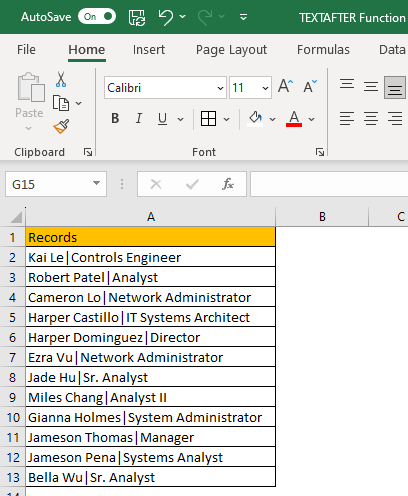
Mapping of the dataset with the syntax of the TEXTAFTER function:
“text” will be Cell A2, as we need to retrieve the records from the cell.
“delimiter” will be the symbol “|” as the employee designation is mentioned after the same.
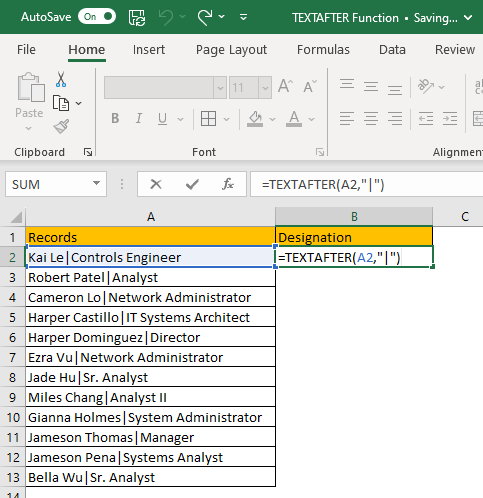
We will use the function in the simplest form using only two required arguments.
Hence our complete function would look like this:
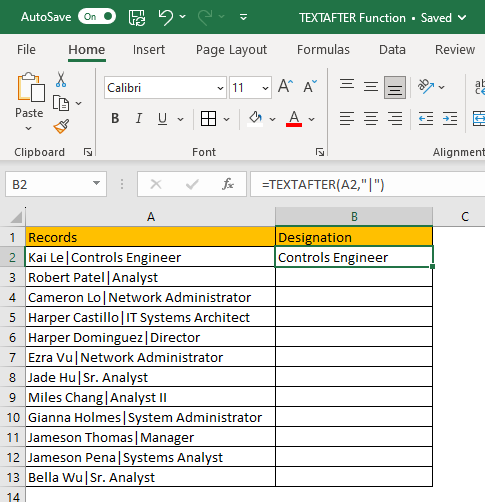
Now we need to apply this function in the corresponding cell B2 and press enter to generate the function result.
Now you can simply drag the function to cover all the cells where the formula needs to be applied and the required text needs to be extracted.
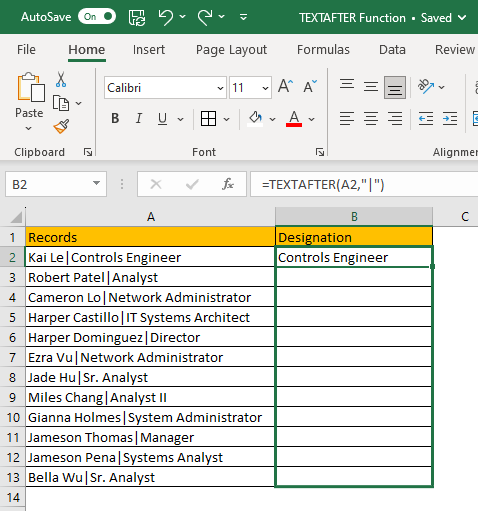
The function is instantly applied to all the cells, and results are displayed in the column. The TEXTAFTER function extracts all the text present after the delimiter in the reference column. If the respective record does not contain the delimiter, the function will return an error value of #N/A.
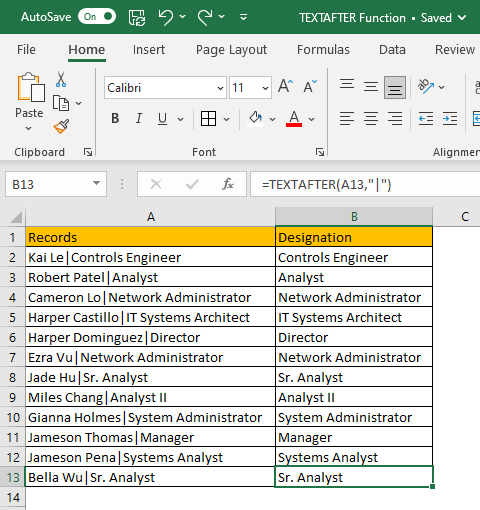
As you can observe, all the employee designations are successfully quoted from the records.
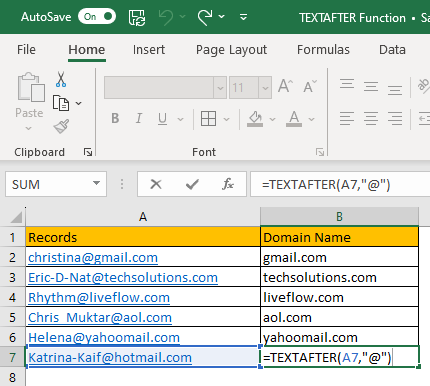
Consider another similar case where you need to fetch the email domain names for the list of email IDs.
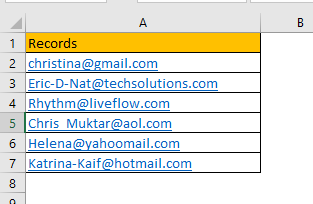
We would enter the function in cell B2 as =TEXTAFTER(A2,"@")
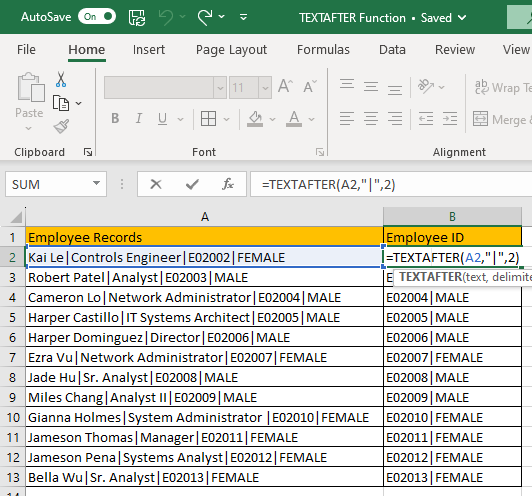
Let’s go through one more example dataset to extract text after “nth” occurrence of the delimiter. In the dataset below, we need to fetch the employee ID and gender from the records.
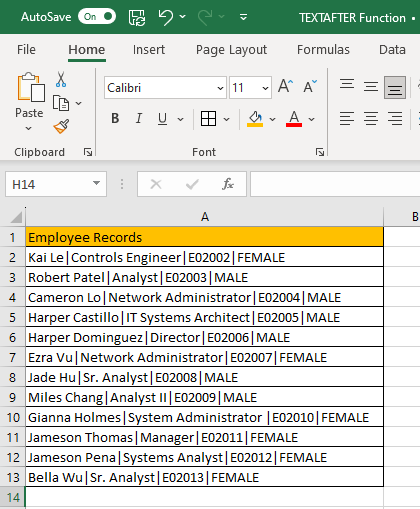
Now to extract the Employee ID and gender, we will use the function below:
Where 2 indicates the second occurrence of delimiter in the reference text.
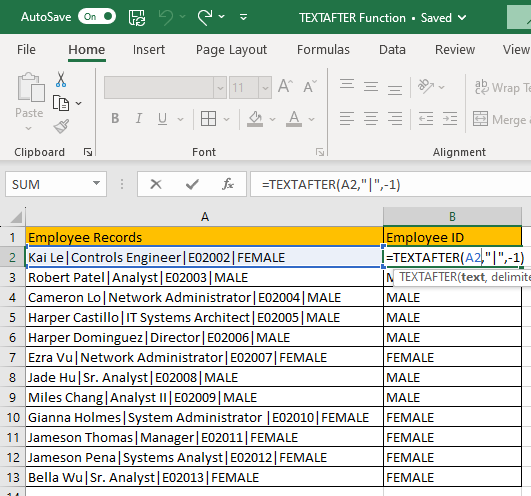
Look at the following example dataset to extract text after the last occurrence of the delimiter. We will use the function as follows:
Here, you need to use a negative value for the instance_num argument.
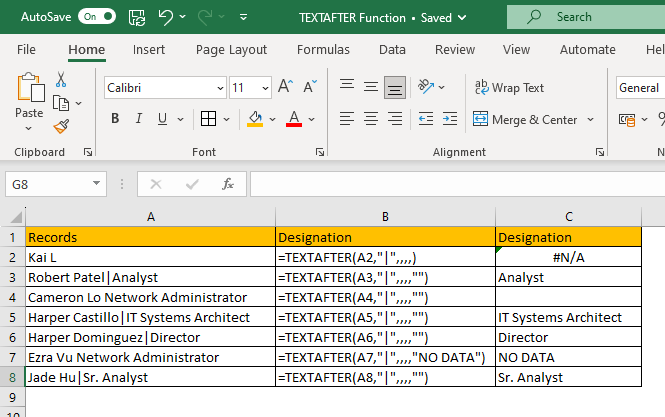
In case there is no text after the defined delimiter, you can set up the function to return as blank rather than a #N/A error. In that case, the function should be defined as follows:
The number of commas is as per the syntax of the function. To return a blank cell instead, we supply an empty string ("") for the “if_not_found” attribute, as shown above. You can replace the blank cell with any character or word by placing the text within quotes for the “if_not_found” argument.
Important note about TEXTAFTER Function in Excel
It is important to note that the TEXTAFTER function is only available in Excel for Microsoft 365 and Excel for the web. It is not available in earlier versions of Excel.
What you may also know: Errors while using the TEXTAFTER function
Below is the list of possible errors which occur as a result of the TEXTAFTER function
- Excel returns a #N/A error if the text string contains no delimiters.
- Excel returns a #VALUE! Error if the “instance_num” is 0 or if it is greater than the length of a text string.
- Excel returns a #N/A error if “instance_num” is greater than the number of occurrences of delimiter.


